Background
With AI and ML in the limelight and hardware refreshes taking place, now seemed like a good time to try out utilizing some spare Nvidia 3070 TI cards and picking up some dirt cheap Tesla M40 24GB cards.
After a little research I settled on using Ubuntu 22.04.4 LTS as my server operating system.
It’s no mystery that having a lot of Ubuntu users creating and updating documentation along with answering posts creates draw for more Ubuntu users. So yes, this decision was driven by market saturation, updated documentation, and prolific amounts of stackoverflow posts.
Warnings & Gotchas
Hardware
I’ve used these steps successfully with the following Nvidia cards:
- Tesla M40 24GB
- These cards make up the bulk of my homelab CUDA count
- RTX 3070 Ti 8GB
- Ventus 3X Series
- RTX 3070 LHR 8 GB
- Zotac GAMING Twin Edge OC
Secure Boot
If Secure Boot is enabled, be prepared to handle creating a new secure key and manually entering the new key before the system can reboot.
How to Reset / Wipe Clean
If something goes wrong and you need to reset:
sudo apt-get remove --purge '^nvidia-.*'
sudo apt-get remove --purge '^libnvidia-.*'
sudo apt-get remove --purge '^cuda-.*'
sudo apt autoremove -y
sudo reboot now
sudo apt-get install linux-headers-$(uname -r)
Prerequisites
Blacklist Nouveau
Create the file /etc/modprobe.d/blacklist-nouveau.conf and prevent nouveau from loading.
Open the file for editing:
sudo vim /etc/modprobe.d/blacklist-nouveau.conf
Add the following lines:
blacklist nouveau
options nouveau modeset=0
Regenerate the kernel initramfs:
sudo update-initramfs -u
Choose your installation method
(Preferred) Package Manager Install
I’ve ended up preferring this installation method as it’s easier to manage. I did explore the local installer without much success, and I don’t believe I’d recommend it if you’re a casual homelabber like myself.
Official Documentation
- CUDA
- The top level official documentation
- docs/common-installation-instructions-for-ubuntu
- Direct link to the common installation instructions for Ubuntu
- /cuda-downloads for ubuntu 22
- Download page that will provide you with the correct and updated URLs for your rig
Keyring and Toolkit
We need the toolkit before the drivers.
# Get the latest URL from download page ^^
wget https://developer.download.nvidia.com/compute/cuda/repos/ubuntu2204/x86_64/cuda-keyring_1.1-1_all.deb
sudo dpkg -i cuda-keyring_1.1-1_all.deb
sudo apt-get update
sudo apt-get -y install cuda-toolkit
Now Choose Your Driver Adventure
Note: If secure boot is enabled, you will need to create a new secure key and type that in prior to the system booting. (This means you may have to do like I did, and grab a spare monitor and keyboard for this.)
The documentation provides two options for drivers, which they describe as “Legacy” and “Open Source”.
In my case, and I’m guessing because I’m using last gen cards, only the “Legacy” drivers worked for me.
Legacy Drivers (worked on 3070’s and M40’s)
sudo apt-get install -y cuda-drivers

# I've found that this is not necessary, but some people seem to recommend it at this point
# sudo reboot now
Did not work for me, but here are the commands for Open Source drivers:
sudo apt-get install -y nvidia-kernel-open-545
sudo reboot now
sudo apt-get install -y cuda-drivers-545
GDS
sudo apt-get install nvidia-gds
Output:

Backing up initrd.img-5.15.0-89-generic to /boot/initrd.img-5.15.0-89-generic.old-dkms
Making new initrd.img-5.15.0-89-generic
(If next boot fails, revert to initrd.img-5.15.0-89-generic.old-dkms image)
update-initramfs.......
Note: I’ve seen: “modprobe: ERROR: could not insert ’nvidia_fs’: No such device” appear here at the end, but upon reboot GDS was working.
Update your shell
Either update your PATH and LD_LIBRARY_PATH exports or enter them:
Open up your profile
vim ~/.zshrc # or ~/.bashrc
Add the following lines:
export PATH=$PATH:/usr/local/cuda-12/bin
export LD_LIBRARY_PATH=$LD_LIBRARY_PATH:/usr/local/cuda-12/lib
Reboot
We do need to reboot here. If you have Secure Boot, now is the time when you’ll need to enter the new key password.
sudo reboot now
Verify
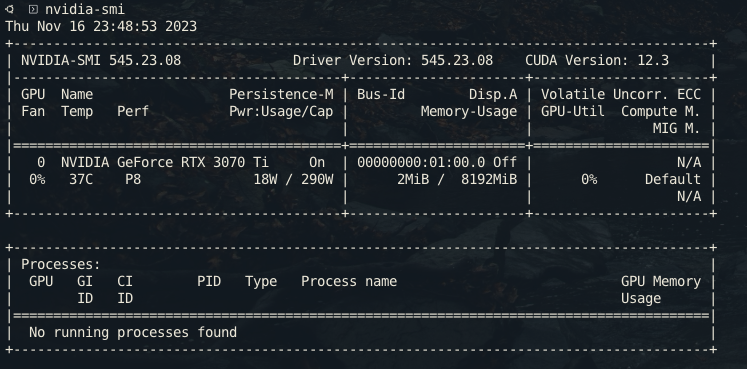
Once you’re back up you can verify your installation and that your paths are set by entering:
nvidia-smi
You should see something like:
Docker Setup
Documentation
Install from Package Manager
sudo apt-get install -y nvidia-container-toolkit
sudo nvidia-ctk runtime configure --runtime=docker
sudo systemctl restart docker
sudo nvidia-ctk runtime configure --runtime=containerd
sudo systemctl restart containerd
Verify
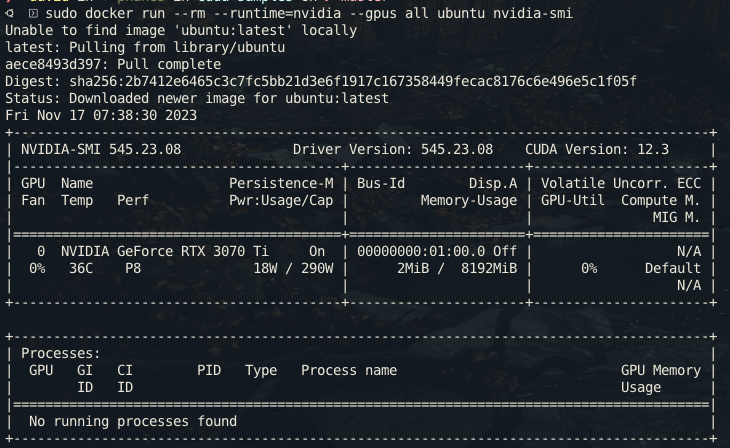
sudo docker run --rm --runtime=nvidia --gpus all ubuntu nvidia-smi
Output
Samples
You can run some samples from the Nvidia repo – here’s a quick example:
git clone https://github.com/nvidia/cuda-samples
cd cuda-samples
make
These can take a while to build, but I’ve found a few of theme useful when verifying my setup.
Commands like:
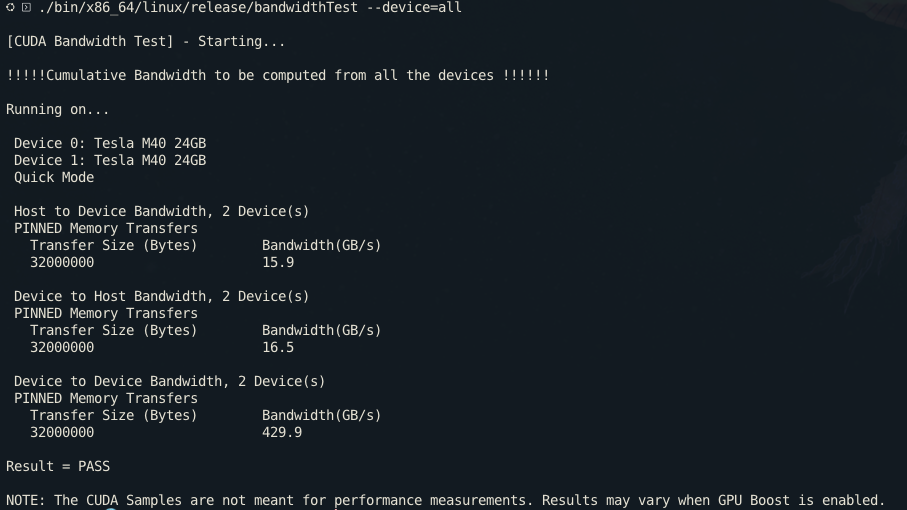
./bin/x86_64/linux/release/deviceQuery
./bin/x86_64/linux/release/bandwidthTest
You can try to run these wih --help to see what they do and what options you can pass them.
Example: